
Full Course for EE/CS Students and Beginners
Here is a practical learning idea for SARC members who enjoy electronics, programming, test equipment, or station automation. The linked STM32 course starts with basic embedded-system concepts and builds toward hands-on projects. You do not need to be an electrical engineering (EE) or computer science (CS) student to begin.
STM32 programming gives radio builders a useful bridge between software and real hardware. Start with a small low-voltage circuit, learn what each line of code does, and grow one tested step at a time.
Topic Snapshot
| Item | Details |
|---|---|
| Subject | STM32 Microcontroller Programming – Full Course for EE/CS Students and Beginners Version 3 |
| Post idea from | Paul Meyers – KE9EJX |
| Audience | SARC members, visitors, new hams, the public, operators, and volunteers |
| Format | Self-paced YouTube course with 34 projects |
| Course length | Approximately 11 hours and 3 minutes[1] |
| Hardware | Course-compatible STM32 hardware and project parts; compare each lesson with the current kit listing before buying |
| Schedule or deadline | None provided; learn at your own pace |
| Call to action | Learn STM32 |
Start With the Full Course
BuildYourCNC presents this long-form course as a project-based introduction for students and beginners. The lessons move from the development environment and basic bit operations to physical inputs, outputs, displays, measurements, timing, communications, circuit-board work, and experiments with AI-generated code.
Watch the STM32 full course on YouTube.
What Is an STM32 Microcontroller?
A microcontroller is a small computer built into one integrated circuit. It runs firmware, which is the program stored on the device. It can read switches and sensors, control LEDs and displays, measure signals, keep time, and exchange data with other equipment.
STM32 is not one interchangeable board or chip. It is a large family of 32-bit microcontrollers from STMicroelectronics based on Arm Cortex-M processor cores.[4] Different STM32 parts have different pins, memory, peripherals, and electrical limits. Always match the exact device and board named in a lesson.
Beginner reminder: Matching the word “STM32” is not enough. Confirm the complete chip or board number, pinout, programmer, supply voltage, and software setup.
Why STM32 Skills Matter to Amateur Radio
Amateur radio combines communication, electronics, software, measurement, and experimentation. A microcontroller can become the control center for a future station accessory or test project.
Possible SARC experiments include a station-status display, environmental sensor, battery monitor, practice keyer, antenna-switch controller, rotator interface, telemetry display, or test fixture. These are examples of where the skills may lead. They are not projects promised by the course.
Radio work also adds special design concerns. RF energy, ground loops, electrostatic discharge, voltage differences, and transceiver control lines can damage a board or radio. Do not connect a microcontroller pin directly to an antenna feed line, push-to-talk line, keying line, or transceiver accessory port. First verify the radio manual and design the correct buffering, level conversion, protection, or isolation.
What the Course Covers
The 34-project course follows a broad path from first setup to more involved hardware and software work.[1] It is not specifically a ham-radio course, but many of the underlying skills transfer well to club projects.
| Learning stage | Topics in the course | Why the skill is useful |
|---|---|---|
| Foundations | STM32CubeIDE setup, project creation, programming, runtime monitoring, troubleshooting, and bit manipulation | Builds the basic workflow for turning source code into running firmware |
| Digital control | LEDs, push buttons, and latching inputs | Introduces general-purpose input/output, usually shortened to GPIO |
| Displays and data | LCD interfacing, strings, pointers, integers, and floating-point output | Helps a project present measurements and status information |
| Measurement and timing | Analog-to-digital conversion, internal temperature, potentiometer input, timers, counters, pulse-width modulation, and interrupts | Supports sensor reading, event timing, and controlled outputs |
| Communication and construction | I2C accelerometer communication, USART serial communication, KiCad printed-circuit-board work, and AI-assisted coding comparisons | Connects the controller to other devices and introduces a path toward a finished circuit board |
I2C is a short-distance digital bus used to connect integrated circuits. USART is a hardware interface for serial data. PWM, or pulse-width modulation, controls the average power delivered to a load by changing pulse timing. An ADC, or analog-to-digital converter, turns a measured voltage into a number the program can use.
Choose the Hardware Carefully
The supplied BuildYourCNC link opens a collection, not one package containing every part for every course project. The collection includes several STM32F0 kit levels, development hardware, a programmer, a book, and related parts.[2]
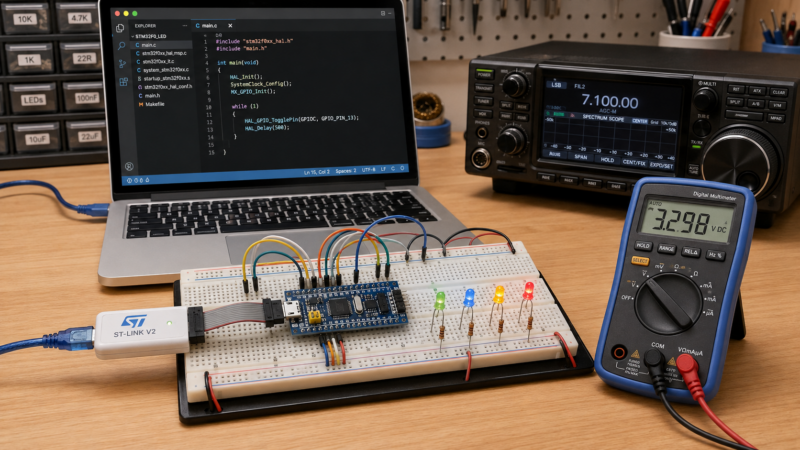
For example, the currently listed beginner kit includes an STM32F030 on a breakout board, an ST-Link V2 programmer and connection cable, three solderless breadboards, jumper wires, buttons, LEDs, resistors, and capacitors. Its listing says that sensors, displays, voltage regulators, crystals, and serial adapters are not included.[3]
Therefore, watch the course overview and inspect the parts needed for the projects you want to build before ordering. Kit contents, prices, stock, and software requirements may change. Check the seller’s current page and STMicroelectronics’ official documentation.
How the Development Setup Works
Write, Build, and Debug
STM32 Cube IDE is STMicroelectronics’ C/C++ integrated development environment, or IDE. It provides tools for editing, compiling, and debugging STM32 code on supported Windows, Linux, and macOS systems.[5] The course demonstrates a specific release, so menus may look different in a newer version. Check the official download page for the current release and system requirements.
Configure the Device
STM32CubeMX is ST’s graphical configuration and code-generation tool. It can help select a device or board, assign pins, configure clocks and peripherals, and generate initialization code.[6] It saves setup time, but it does not replace the need to read the board documentation, device datasheet, and reference manual.
Program the Microcontroller
An ST-LINK is an in-circuit programmer and debugger. It can load firmware and communicate with compatible STM32 hardware through interfaces that include Serial Wire Debug, or SWD.[7] Some boards need a separate probe. Many STM32 Nucleo boards include an ST-LINK on the board, but that does not apply to every STM32 product.[8]
How the Learning Process Works
flowchart TD
    A["Choose one course project"] --> B["Confirm the exact chip, board, parts, and software"]
    B --> C["Build the low-voltage circuit with power disconnected"]
    C --> D["Connect the programmer and apply the correct power"]
    D --> E["Build and flash the firmware"]
    E --> F["Observe the result and use the debugger"]
    F --> G{"Does it work as expected?"}
    G -- "Yes" --> H["Change one item and test again"]
    G -- "No" --> I["Check power, ground, cable, device choice, pins, and code"]
    I --> D
    H --> J["Record the result and plan the next project"]
This same cycle appears in ST’s official beginner material: install the tools, run a first program, blink an LED, build and debug, and then move toward serial communication and sensors.[9]
How to Participate
- Open the full course and watch the introduction and setup sections first.
- Choose one project. Write down its exact microcontroller, board, programmer, parts, and software requirements.
- Compare that list with the current kit description. Do not assume one kit contains every course component.
- Install software only from the official publisher or another source you trust.
- Build with power disconnected. Then inspect every power, ground, and signal connection before applying power.
- Compile and flash a known example before changing the code.
- Change one thing at a time. Record what worked, what failed, and how you fixed it.
- Share useful notes and questions with other SARC builders.
- Build a SARC Taking the ESP32 Lightning Detector to the Next Level – Kent Ochs, W9KAO
What to Bring
| Item | Why it helps |
|---|---|
| Computer | Runs the course video, development software, and documentation |
| Course-compatible STM32 board or kit | Provides the exact target hardware used by the selected lesson |
| Programmer/debugger | Loads firmware and helps diagnose code; it may be separate or built into the board |
| Correct data-capable USB cable | Connects the development hardware to the computer |
| Breadboard, jumper wires, and lesson parts | Supports low-voltage circuit experiments |
| Board documentation and device datasheet | Confirms pin assignments, voltage limits, and electrical requirements |
| Digital multimeter | Checks power, continuity, and signal levels before troubleshooting software |
| Notebook or project log | Records settings, wiring, error messages, and successful changes |
Safety note: Work only within the ratings in the official documentation. Never assume an input is 5-volt tolerant. Keep the first projects separate from a radio, amplifier, mains circuit, battery bank, antenna system, or other high-energy equipment.
A Good First Project
Begin with a known, low-risk example. Flash firmware that blinks one LED. Next, read a push button. Then send a short status message over the serial connection supported by your setup.
When that works, change only one timing value, input, or message. Rebuild, flash, test, and write down the result. This small loop teaches more than copying a large project that you cannot yet explain.
The course ends with AI-assisted coding comparisons. Treat generated firmware as an unverified draft. Read every line, keep compiler warnings visible, test on a current-limited low-voltage bench supply when appropriate, and never allow unreviewed code to control a transmitter, relay, motor, charger, or safety-related function.
Suggested SARC Goals
| Participant | Suggested goal |
|---|---|
| Curious visitor | Watch the course introduction and learn what a microcontroller does |
| New programmer | Build and flash one known working example |
| New ham | Learn how firmware, pins, voltage limits, and external circuits work together |
| Experienced operator | Prototype one isolated station-status or monitoring function |
| Hardware builder | Practice reading a pinout and checking every power and signal connection |
| Volunteer | Document setup steps and common troubleshooting lessons for other members |
| Club project team | Select one small, repeatable project that members can build and explain |
Give It a Try
You do not need to complete all 34 projects at once. Pick one lesson, match the hardware carefully, and aim for one clear result. A blinking LED may seem simple, but it proves that the computer, toolchain, programmer, microcontroller, power, and firmware are all working together.
Learn STM32: start the full course, review the current STM32 kit choices, and visit N9RJV.org for more SARC learning and project ideas.
Watch the course and complete your first verified STM32 project
References
- BuildYourCNC. “Learn STM32 Microcontroller Programming – Full Course for EE/CS Students and Beginners Version 3.” YouTube. Published March 4, 2026. Accessed August 15, 2026. https://www.youtube.com/watch?v=vKyL43qXPpk ↩ ↩
- BuildYourCNC. “ARM (STM32) Microcontroller Kits.” Accessed August 15, 2026. https://buildyourcnc.com/collections/arm-stm32-microcontroller-kits ↩
- BuildYourCNC. “ARM Microcontroller Beginners Kit (STM32F0).” Accessed August 15, 2026. https://buildyourcnc.com/products/newbiehack-microcontroller-arm-stmicro-stm32f0r6-beginners-kit ↩
- STMicroelectronics. “STM32 Microcontrollers (MCUs).” Accessed August 15, 2026. https://www.st.com/en/microcontrollers-microprocessors/stm32-32-bit-arm-cortex-mcus.html ↩
- STMicroelectronics. “STM32CubeIDE | Software.” Accessed August 15, 2026. https://www.st.com/en/development-tools/stm32cubeide.html ↩
- STMicroelectronics. “STM32CubeMX | Software.” Accessed August 15, 2026. https://www.st.com/en/development-tools/stm32cubemx.html ↩
- STMicroelectronics. “ST-LINK/V2 In-Circuit Debugger/Programmer for STM8 and STM32.” Accessed August 15, 2026. https://www.st.com/en/development-tools/st-link-v2.html ↩
- STMicroelectronics. “STM32 Nucleo Boards.” Accessed August 15, 2026. https://www.st.com/en/evaluation-tools/stm32-nucleo-boards.html ↩
- STMicroelectronics STM32 MCU Wiki. “Getting Started with STM32: STM32 Step-by-Step.” Accessed August 15, 2026. https://wiki.st.com/stm32mcu/wiki/Category%3AGetting_started_with_STM32_%3A_STM32_step_by_step ↩